
Learning to sew by hand is a practical skill that can make everyday clothing care easier and more enjoyable. Whether you want to repair a loose button, shorten a hem, or personalize an old shirt, basic stitching techniques can help you achieve neat results. You do not need an expensive sewing machine or professional experience to begin making useful improvements to your wardrobe.
These basic hand sewing tips will help you understand essential tools, learn beginner-friendly stitches, and complete simple clothing alterations. You will also discover creative outfit ideas that make use of your new sewing skills. With a little practice, you can refresh familiar clothes, improve their appearance, and develop a more versatile personal style.
Why Learning Basic Hand Sewing Is Useful for Everyday Style
Hand sewing gives you greater control over small clothing repairs and simple alterations. Instead of setting aside a garment because of a loose seam or missing button, you can often fix the problem yourself. This practical skill helps extend the useful life of clothing while keeping everyday outfits neat, comfortable, and ready to wear.
Another benefit is the freedom to make small changes that better suit your preferences. You can adjust a loose hem, secure decorative details, or repair an opening without changing the garment’s overall design. These improvements may seem minor, but they can make existing wardrobe pieces feel more polished and easier to coordinate.
Learning to sew also encourages a thoughtful approach to fashion and clothing maintenance. Rather than replacing garments whenever a minor problem appears, you can evaluate whether a simple repair will restore their usefulness. Over time, basic sewing skills can support a more flexible wardrobe and make experimenting with different outfit combinations easier.
Essential Hand Sewing Tools Every Beginner Should Have
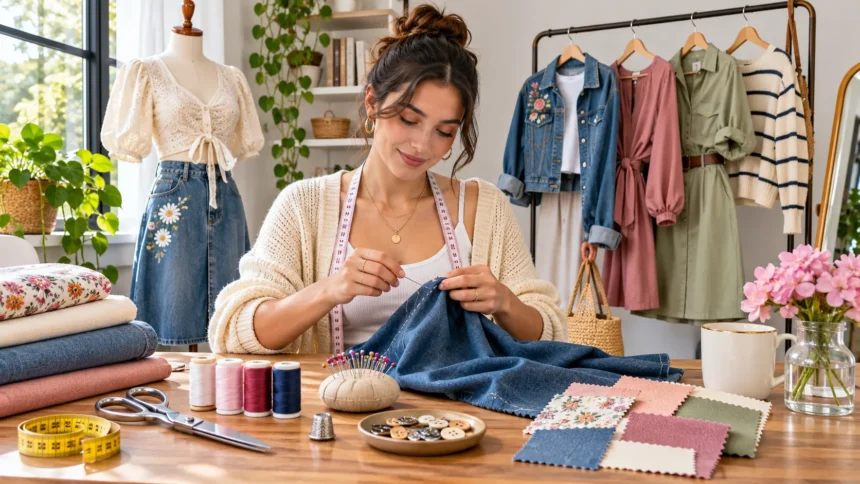
A beginner sewing kit does not need to contain complicated equipment or expensive accessories. Start with several hand-sewing needles, all-purpose thread, fabric scissors, pins, and a measuring tape. These basic tools are sufficient for many common tasks, including attaching buttons, repairing small seams, and completing simple garment alterations at home.
Needles come in different sizes and shapes because fabrics vary in thickness and structure. Fine needles work well with lightweight materials, while stronger needles are better suited to thicker woven fabrics. Choose thread that closely matches your garment’s color and weight, since the correct combination helps create attractive stitches that remain secure during normal use.
Additional tools can make your work more accurate and comfortable as your confidence grows. A seam ripper removes unwanted stitches, tailor’s chalk marks temporary guidelines, and a thimble helps protect your finger when working with dense material. Store your supplies in a small container so everything remains organized and accessible whenever a clothing repair is needed.
How to Choose the Right Needle and Thread for Your Fabric
Choosing suitable sewing materials is one of the most important steps in achieving a clean finish. Fabric thickness, stretch, and construction determine which needle and thread will perform best. Using unsuitable supplies can cause noticeable holes, uneven stitching, or unnecessary strain on the material, especially when working with delicate or tightly woven fabrics.
For everyday cotton shirts, skirts, and lightweight trousers, a standard sharp hand-sewing needle and polyester thread often work well. Thin materials such as silk or chiffon benefit from finer needles and lightweight thread that pass through the fabric gently. Heavier denim or canvas may require stronger needles that can move through multiple layers without bending.
Stretch fabrics need special attention because the material moves and expands during wear. A suitable stretch-friendly stitch and needle can help reduce broken thread and damaged fibers. Before starting a visible repair, test your needle and thread on an inconspicuous section to make sure the stitching looks smooth and the fabric remains undamaged.
How to Thread a Needle and Secure Your Stitches
Threading a needle becomes easier when you begin with a cleanly cut piece of thread. Cut a manageable length, usually around 18 inches, and pass one end through the needle’s eye. If the thread frays, trim the end again or use a needle threader to guide it through the opening.
For many beginner repairs, you can use a single strand of thread with a knot at the end. Folded double thread can provide additional strength for suitable tasks, such as attaching certain buttons. Avoid using unnecessarily long lengths because they can become tangled, develop knots, and make it harder to maintain consistent sewing tension.
Securing your stitches properly helps prevent repairs from loosening after regular wear or washing. Start with a small knot hidden on the wrong side of the fabric or use tiny securing stitches where appropriate. When finishing, make a few small stitches in the same area, secure the thread neatly, and trim the excess without cutting into the garment.
Basic Hand Sewing Stitches Every Beginner Should Learn
The running stitch is one of the simplest techniques for people learning how to sew by hand. Move the needle up and down through the fabric at regular intervals to create a line of straight stitches. This method is useful for temporary basting, gathering fabric, and completing lightly stressed sewing tasks that do not require strong reinforcement.
A backstitch produces a stronger seam by overlapping stitches along the same sewing line. Bring the needle forward through the fabric, move backward to complete the previous stitch, and repeat the process. This technique works well for repairing split seams in shirts, trousers, and other woven garments that experience movement during everyday activities.
The whip stitch and slip stitch are also valuable additions to your beginner sewing skills. A whip stitch can secure fabric edges, while a slip stitch helps create less noticeable stitching on certain hems and folded edges. Practicing these techniques on scrap fabric makes it easier to understand stitch spacing, tension, and the appearance of finished repairs.
How to Sew Straight Lines and Keep Stitches Even
Straight stitching improves the appearance and durability of many clothing repairs. Beginners often struggle with uneven spacing because they focus entirely on moving the needle through the material. Drawing a temporary guideline with tailor’s chalk or a washable fabric marker can make it easier to maintain a consistent direction while sewing.
Hold the fabric comfortably without pulling it tightly or stretching it out of shape. Insert the needle at regular intervals, using nearby stitches as a visual reference for spacing. Small, controlled movements generally produce better results than rushing, especially when sewing areas that will remain visible on the finished garment.
Practice on a piece of plain cotton before repairing your favorite clothing. Draw several straight lines and sew along each one using a running stitch or backstitch. Compare the results, adjust your hand position, and concentrate on creating consistent stitches without tightening the thread enough to gather the fabric.
How to Repair Small Clothing Tears and Loose Seams
Small tears and loose seams are common problems that can often be repaired with basic hand sewing. Begin by turning the garment inside out and examining the damaged area carefully. Determine whether the thread has broken along an existing seam or whether the fabric itself has torn, because these problems require different repair approaches.
For a split seam with intact fabric, align the original edges and secure them with pins if needed. Use a backstitch along the existing seam line, beginning slightly before the opening and continuing beyond it. Keep your stitches secure without pulling the fabric too tightly, then finish the thread neatly on the inside.
A tear in the middle of the fabric may require a patch, reinforcement, or another suitable mending method. Bringing weak fabric edges together without support can create additional tension and lead to another tear. Choose a repair that matches the material and preserves the garment’s shape, especially when the damaged area experiences frequent movement.
How to Sew a Button Back onto Your Favorite Clothes
Loose or missing buttons can make an otherwise wearable outfit difficult to use. Fortunately, attaching a button is one of the easiest beginner hand sewing projects. Choose a replacement that matches the original size and style, then identify the correct position using an existing stitch mark or the corresponding buttonhole.
Thread your needle and secure the first stitch on the inside of the garment. Position the button correctly, then pass the needle through its holes several times to attach it securely. For thicker fabrics, leave a small amount of space beneath the button so the garment can fasten comfortably without placing excessive tension on the thread.
Finish by securing the thread beneath the button or on the wrong side of the fabric. If necessary, create a small thread shank to provide room for the buttonhole fabric when the garment is closed. Check that the button feels secure and sits naturally before wearing the shirt, jacket, cardigan, or trousers again.
How to Hem Pants, Skirts, and Dresses by Hand
Hand hemming allows you to shorten or repair certain garment edges without using a sewing machine. It can be especially helpful for trousers, skirts, dresses, and lightweight clothing that need small adjustments. Before sewing, try on the garment and determine the desired finished length while wearing the shoes you would normally pair with it.
Mark the new hem carefully and check that it remains even around the garment. Leave enough fabric for the planned hem allowance, then press the fold if the care label permits ironing. Use pins or temporary basting stitches to hold the material in place before beginning the permanent stitching.
A slip stitch or suitable blind hemming technique can help keep stitches less visible on the outside. Take small amounts of fabric with each stitch and maintain gentle, consistent thread tension. Once finished, inspect the hem from different angles and try the garment on again to confirm that the length and drape look natural.
How to Make Hand Sewing Repairs Look Neat and Invisible
A neat sewing repair begins with careful preparation rather than complicated stitching. Match the thread color to the original fabric whenever possible and follow the garment’s existing construction lines. Working from the inside helps hide knots and thread ends, making the repair less noticeable when the clothing is worn.
Stitch size and thread tension also influence how professional the finished result appears. Uneven stitches may create visible gaps, while excessive tension can cause puckering or wrinkles around the repaired area. Aim for controlled, consistent stitches that hold the material securely without changing its natural shape or movement.
After completing the repair, remove temporary markers, loose threads, and any remaining pins. Press the area carefully when appropriate for the material, using a pressing cloth if needed. Examine the garment in natural lighting to check for visible pulling or misplaced stitches before including it in your next outfit.
Common Hand Sewing Mistakes and How to Avoid Them
One common beginner mistake is selecting a needle that does not suit the fabric. A needle that is too large can leave visible holes in delicate material, while an unsuitable needle may struggle with thicker layers. Test your supplies beforehand and select tools that match the garment’s construction and sewing requirements.
Another frequent problem is pulling the thread too tightly after each stitch. This can cause fabric to gather, distort the seam line, or create uncomfortable areas around the repair. Allow the thread to settle naturally against the fabric while making sure the layers remain securely connected throughout the stitching process.
Rushing through repairs can also result in crooked seams, tangled thread, and insecure finishing knots. Take time to align the material, check stitch placement, and inspect the work as you progress. If a section looks uneven, carefully remove the affected stitches and repeat them rather than continuing with a mistake.
Easy Outfit Ideas Using Your New Hand Sewing Skills
A classic jeans-and-T-shirt outfit is a good starting point for practicing clothing repairs and small style adjustments. You can repair loose stitching on jeans, secure a shirt hem, or replace a missing button on a casual overshirt. These simple improvements help everyday clothing look tidy while preserving its familiar, comfortable appearance.
For a smart-casual outfit, pair well-maintained trousers with a button-down shirt and a lightweight cardigan. Use your hand sewing skills to secure loose buttons, repair small openings, or tidy a visible hem before putting the outfit together. Simple details such as neat cuffs and properly aligned closures can make familiar pieces look more polished.
A relaxed weekend outfit can include a denim skirt, plain top, and lightweight jacket. You might use decorative hand stitching to personalize a pocket or repair a small worn area with a complementary fabric patch. These subtle changes add character without requiring a complete wardrobe update or complicated garment construction.
Creative Clothing Customization Ideas for Beginners
Hand sewing is not limited to repairing damaged clothes because it can also support simple creative projects. Adding decorative patches, embroidery accents, or carefully placed fabric details can refresh familiar garments. Beginners should choose small projects that require limited stitching and do not interfere with the garment’s comfort or everyday function.
A plain denim jacket provides an easy starting point for decorative patches or simple embroidered shapes. You can position a small design near a pocket, cuff, or other flat section that is easy to reach. Secure the decoration with suitable stitches and check that its backing does not feel uncomfortable against the body.
Other beginner projects include personalizing tote bags, adding decorative stitching to shirt pockets, or attaching fabric appliqués to casual clothing. Choose colors that complement items already in your wardrobe so the finished piece remains easy to style. These creative sewing activities encourage experimentation while building confidence with basic needlework techniques.
How to Care for Hand-Sewn Clothing and Make Repairs Last
Proper clothing care can help hand-sewn repairs remain secure through repeated use. Always follow the garment’s fabric care label, especially when washing delicate, stretchy, or heavily embellished materials. Gentle handling reduces unnecessary strain on repaired seams and helps preserve the appearance of both the stitching and surrounding fabric.
Inspect repaired areas occasionally to check for loose threads, weakened stitches, or developing gaps. Small problems are usually easier to correct before they become larger openings. If the same seam repeatedly fails, consider whether the garment’s fit, fabric condition, or original construction needs attention beyond a simple repair.
Store sewing supplies somewhere accessible so minor maintenance tasks do not get overlooked. Keeping spare matching buttons, suitable thread, and a few needles can make everyday repairs more convenient. Regular clothing maintenance helps extend garment life, supports a versatile wardrobe, and gives you more opportunities to practice useful hand sewing skills.
Conclusion
Learning basic hand sewing tips is a practical way to maintain your clothing and develop useful creative skills. Simple techniques such as running stitches, backstitches, button attachment, and hand hemming can solve many everyday wardrobe problems. With suitable tools and consistent practice, beginners can complete small repairs confidently without relying on specialized equipment.
Hand sewing also creates opportunities to personalize outfits and refresh pieces you already own. From repairing favorite jeans to adding decorative details to jackets, small projects can improve both clothing appearance and versatility. The key is choosing techniques that suit the fabric and paying attention to stitch placement, tension, and finishing details.
Start with manageable repairs, practice regularly, and gradually explore more creative clothing projects as your skills improve. A well-maintained wardrobe does not require constant replacement when many small issues can be repaired. By combining practical sewing techniques with thoughtful outfit ideas, you can enjoy clothes that remain comfortable, functional, and suited to your personal style.
Frequently Asked Questions
What are the most important basic hand sewing tips for beginners?
Start with suitable needles, matching thread, and simple stitches such as running stitch and backstitch. Practice on scrap fabric, maintain even thread tension, and secure your stitches carefully before attempting repairs on favorite garments.
What is the easiest hand sewing stitch to learn?
The running stitch is generally the easiest technique for beginners because it involves passing a needle through fabric at regular intervals. It works well for practice, temporary basting, and lightly stressed sewing tasks.
Can I alter clothes by hand without a sewing machine?
Yes, you can complete many small alterations by hand, including shortening certain hems, replacing buttons, and repairing seams. More complicated adjustments may require additional techniques or professional tailoring for the best results.
How do I make my hand sewing stitches look professional?
Use matching thread, follow existing seam lines, and keep your stitches evenly spaced. Avoid pulling thread too tightly, secure knots neatly, and press the finished area when the fabric care instructions allow.
What clothing projects should beginners try first?
Beginners can start by replacing buttons, repairing small seam openings, hemming simple garments, or decorating tote bags. These projects teach essential sewing techniques while producing useful results that can improve everyday wardrobe maintenance.